
◊ By Sujit Sumitran
Visit ORGANIC SHOP by Pure & Eco India
INGREDIENTS
- Water, 375 gm
- Whole Wheat Levain, 100 gm
- Organic Maida (all purpose flour), 385 gm
- Organic Whole Wheat Flour, 115 gm (not store bought, home milled or stone milled)
- Fine Grind Sea/Rock Salt, 10 gm
METHOD
AUTOLYSE: Transfer the water to the mixing bowl and add the flour blend (500 gm) to this mix. Mix well till all the flour is well hydrated and you can’t see or feel any dry patches. Let the dough rest for 30 minutes. This is a crucial step as it allows the flour to absorb the water and relax into a cohesive mass. More importantly, this step kickstarts the gluten formation process.

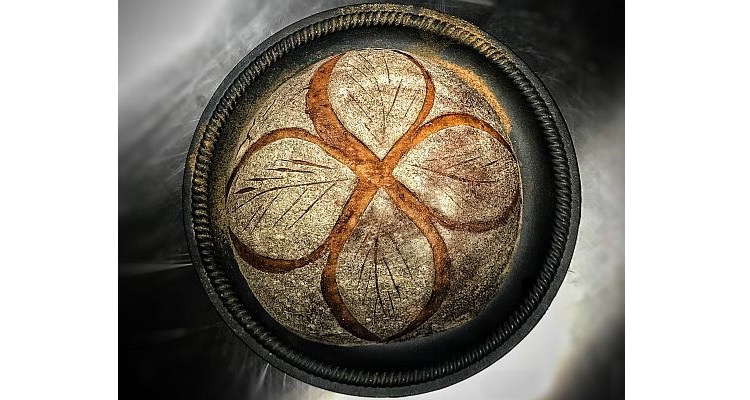
Photo by Siddharth Sumitran
MIX: Now transfer100 gm of the levain (sourdough culture) to the dough. Pull the dough from under and drop it over the levain while turning the bowl. The levain should now be completely inside the dough. Now, add 10 gm of salt onto the surface of the dough. Again, pull the dough from under and drop it over the salt, turning the bowl. The salt should be enclosed in the dough. Moisten your fingers and palm and using your thumb and index finger like pincers, cut through the dough and remix.
Essentially, you want to ensure that the salt and the levain are evenly distributed across the dough. The dough will be sticky, so have a bowl of water close by to moisten your hands every time you find the dough sticking to your fingers and palm. While moistening your hand, please ensure that you don’t transfer water into the dough. Aim for an internal dough temperature of 76 to 80°F (25 to 27°C) right through the fermentation process.
TURN: This is a series of stretch and folds that you employ to develop the gluten. This formula calls for 4 turns every 30 minutes. You’ll be done with the turns in two hours. Leave the dough covered for another hour or till the dough increases in volume by 20 to 30%. You’ll also see air bubbles along the sides of the mixing bowl— indicators that the fermentation is done and the dough is ready to be shaped and proofed. Your dough temperature should be between 76 to 80°F.
PRESHAPE: Using a flour-dusted silicon spatula or a plastic dough scraper, gently nudge the dough onto a lightly floured surface. Quickly flour your fingers and stretch and fold the dough and shape into a ball. Dust the surface and cover with a kitchen napkin. Let it be for 15 to 20 minutes.
SHAPE: Take a 50:50 mix of rice flour and whole wheat flour and dust a kitchen napkin with the flour mix generously. Transfer the napkin carefully onto your proofing basket/colander/banneton. Using the bench scraper, turn the dough 180°, so that the floured surface is below. Now, do one more set of stretch and folds and turn the dough 180° so that the seam is at the bottom. With your little fingers (well dusted with flour) under the dough (away from you), pull the dough towards you and keep turning the dough clockwise, while simultaneously pulling it towards you till you feel the dough tighten on the surface.
Alternately, use a dough scraper and quickly push under the dough at a 45-degree angle till it turns into a tight ball. Ensure that the surface on which the dough sits, is free of flour or there won’t be enough friction for the dough surface to tighten.
PROOF: Transfer the dough seam-side up on the proofing basket, cover with a plastic bag and transfer into the fridge. In about 3 to 3.5 hours or so, you should be ready. Alternately, let it cold proof overnight (assuming you started the fermentation in the evening). One way to check if the dough is ready is to do the finger dent test. When you gently poke the dough, it should spring back slowly but maintain its indent.
BAKE: Preheat oven to maximum temperature (250°C) with a Dutch Oven (DO) in it. I normally heat it for 40 minutes. This needs to be timed in a manner that when the dough is proofed and ready, the DO is also hot and ready. Transfer the dough carefully into the DO, seam-side down and bake for 20 minutes with the lid on. Take off the lid, drop the temperature to 225°C and bake for another 20 to 25 minutes till the loaf is a gorgeous chestnut brown. Transfer the loaf to a cooling rack and let it rest for at least a couple of hours before slicing. If you don’t have a DO, transfer the dough seamdown on parchment paper and transfer this onto a baking tray. Transfer the baking tray into a preheated oven at 250°C. Quickly spray the sides of the oven with water, every five minutes for the first 15 minutes. Continue baking till the loaf is chestnut brown. Transfer to a cooling rack and wait a couple of hours before slicing.
REFRESH THE LOAF: This step is used to refresh the loaf if it’s gone cold or is left over. Lightly spray the loaf all over with water. Set the oven at 150°C and the timer for 10 minutes. Toss the loaf in and let it stay inside even after the oven has turned off. After 30 minutes, (to ensure you don’t slice into a gummy crumb) tap on the loaf. If you hear a nice hollow, crisp sound, you’re ready to start slicing.
Sujit Sumitran is a sourdough bread baker and a leadership coach in Goa. His artisanal bread recipes can be found on Instagram, at www.instagram.com/sujitsumitran (Photo by Siddharth Sumitran)
NOW EXPERIENCE A SEEDGASM!
Leave a Reply